So I attempted her Rose Cake with Vertical Layers, and it was SO much fun to make!
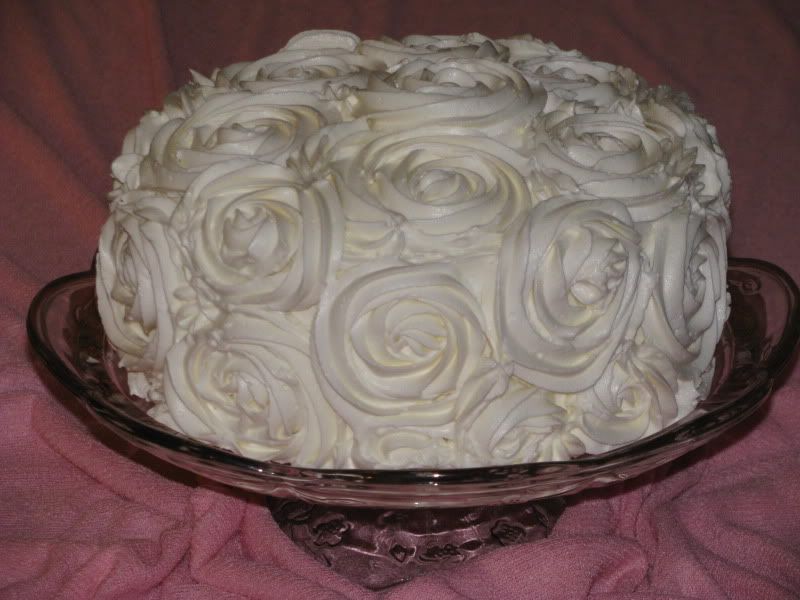
I used a Red Velvet Cake and a White Almond Sour Cream Cake (WASC) for the vertical layers, and a crusting Vanilla Buttercream icing.
Although my pictures aren't very pretty- you get the idea of how this is done- it was pretty simple and a huge hit with the mommy-to-be, and my other coworkers :)
Without further ado- here are a couple of photos- a photo of the inside layers will be added soon.
These steps aren't complete- but you get the general idea of how to assemble the Vertical Layer cake.
1) Make two 2" 2-layer cakes (or just make two 3" or 4" cakes instead of making a multi-layer cake (I used Red Velvet and WASC flavors). If making a 2-layer cake, while the cakes are still hot, torte them and stick them together with the crumb-side facing each other (after drizzling simple syrup between the layers to help them stick together). Stick the cakes in the freezer for at least 5-6 hours.
2) Take a cardboard round the size of your cakes and draw symmetrical circles on the cardboard- basically like a replica of a dart board. Keep the cardboard round in tact.
3) Cut each cake using the outer circle first- as you see in the photo below each circle cut into the cake is the same distance as the other cake. Once the first circle has been cut, take the cardboard round and cut the outside layer off- which will make a smaller circle. Use that circle to make identical cuts on the cakes again. Then cut the cardboard round one more time, then put the smaller cardboard round back on the cake to make additional identical cuts in the cakes- do this until you have used all of the rounds (this is starting to confuse me- if you have questions about how it is done, I'll email you more specific directions- or you can check out I Am Baker's blog- did I mention she's amazing?!)

4) Next disassemble each of the layers of both cakes. Take the center of the Red Velvet cake, and wrap the next-sized layer of the WASC around the core of the Red Velvet. Then take the next-sized layer of the Red Velvet, and wrap it around the WASC. Do this until you don't have any other layers to wrap around each other. This will make two cakes with reverse-layers like you see in the photo below.

5) Next put a simple syrup on the layers, wrap them in wax-paper, then tie it with a piece of towel or soft material, and freeze for about 2 hours. Don't add too much simple syrup, just add enough to help the layers stick together.

6) Allow the cake to thaw to avoid it's production of condensation under the crusting buttercream frosting. Put on a crumb coat so the cake can no longer be seen. Allow the crumb coated cake to sit for about 15 minutes before decorating.

7) Next cover the cake with piped-roses. Start with a 1M large star tip, and make the roses the size of a cupcake. I started on the top of the cake and worked over the edges then down the sides of the cake. When you find a gap, you can just make a "swoosh" of icing that follows the curve of the rose.


Below is a photo of the Vertical Layers. The party guests cut into it before I could get a good picture, so this is the carnage that followed the initial cutting of the cake. Next time I make this I'll take additional photos!

I used the following crusting buttercream recipe, and it was very yummy- not too sweet, but it crusted very well.
Crusting Buttercream Ingredients:
1 cup butter, unsalted
1 cup vegetable shortening
8 cups powdered sugar (confectioner's sugar)
3/4 cup heavy cream
3 teaspoons vanilla extract
1/4 teaspoon salt
Instructions:
- In a stand mixer (you can use a hand mixer, but stand mixer is preferred), blend together the butter, shortening and salt.
- Slowly mix in the powdered sugar, whipping cream and vanilla extract.
- Once the ingredients have been combined, mix on high for 5-10 minutes until the frosting is well beaten, light and fluffy.
- You can add different flavored extracts if you do not want to use vanilla- Almond is a popular flavor, or an Almond-Vanilla combo.


